Island 1 — Starting Island
Big Boss: Spider Crab
| |
|---|
| Difficulty | Newbie killer; don't rush in blindly |
| Mechanics | Charges at the player, becomes stunned after hitting a wall |
| Strategy | Lure it into charging into a wall, then melee it (knife/knuckle) while it's stunned |
| Warning | Don't get greedy — 3–4 grabs and you're dead; very low margin for error early on |
Island 2 — Unlocks Pistol, Shotgun, Dynamite
Mini Boss: Mambo
| |
|---|
| Difficulty | Extremely low |
| Strategy | A pure punching bag that pays out — hit it however you like |
Mini Boss: Big Pike
| |
|---|
| Difficulty | Low |
| Strategy | It can deal some damage but not much; fight it normally |
Big Boss: Big Piranha
| |
|---|
| Difficulty | Medium (nasty) |
| Mechanics | Periodically splits into a swarm of small piranhas that hit hard |
| Strategy | ① Blow up the adds with dynamite first ② After clearing the small fish, blast it point-blank with the shotgun ③ When low on HP, snack on the small piranhas on the ground to heal |
| Note | You must pick up leeches from the ground and trade them to an NPC for bait to summon this boss |
Island 3 — Unlocks SMG and Grilling
Note: From this island onward, bosses have an escape countdown — you must kill them before they flee.
Mini Boss: Blue Shark
| |
|---|
| Mechanics | Fast short-range dashes and small jumps |
| Strategy | Island 3 has plenty of trees — circle around them; or strafe left/right to dodge the dashes |
| Note | Its dash is fast, keep moving |
Big Boss: Pufferfish
| |
|---|
| Difficulty | High (extremely high in co-op) |
| Mechanics | ① Grows bigger as its HP drops ② Leaves a poison trail behind it below half HP |
| Strategy | ① Open with dynamite to chunk its HP — a bigger body is actually easier to hit ② Circle around trees, exploiting the fact that it speeds up in a straight line but slows down when turning ③ Keep distance and kite it |
| ⚠️ Co-op | In multiplayer the pufferfish's HP scales hugely — it can be nearly impossible to beat legitimately; use the dynamite cheese instead (see general tricks below) |
| Summoning | Trade rare fish like needlefish, seahorses, or fishbowl fish to the NPC to summon it |
Island 4 — Unlocks Sniper Rifle
Mini Boss: Tuna
| |
|---|
| Mechanics | An upgraded Blue Shark — bigger, harder-hitting |
| Strategy | Its dash is slower than the Blue Shark's, but it does high jumps; keep strafing to dodge |
| Summoning | Throw the Tuna on the ground and wait to summon the big boss (Albatross) |
Big Boss: Albatross
| |
|---|
| Difficulty | Barely any difficulty at all |
| Mechanics | ① Flies in the air ② Its ranged volleys rarely land ③ Performs dive attacks |
| Strategy | Strafe in one direction to easily dodge the dives; deal damage while it's low |
| Annoying part | It never stops flying — you need patience waiting for it to come down |
Island 5 — Unlocks Assault Rifle
Mini Boss: Goblin Shark
| |
|---|
| Difficulty | Low |
| Strategy | Just an oversized Big Pike — fight it normally |
| Summoning | Trade five any small fish species to the masked NPC to summon it |
Big Boss: Bowhead Whale
| |
|---|
| Difficulty | High (extremely hard solo) |
| Mechanics | ① High damage, huge hitbox ② Constantly leaps and slams the ground ③ Landing causes a wide shockwave and screen shake ④ Chain-jumps with endless stamina ⑤ Open arena with lava traps |
| Strategy | ① Predict its landing spot and reposition ② Stockpile lots of dynamite and detonate as it lands ③ Take advantage of its huge body to land shots |
| Solo notes | You must beat it on one life — death means game over; you can carry at most 5–6 healing items; one slam takes 3/4 of your HP, and a tail swipe one-shots you |
| Cheese | Pile up seagull corpses to heal — seagulls won't pick up other seagulls' bodies |
Final Boss
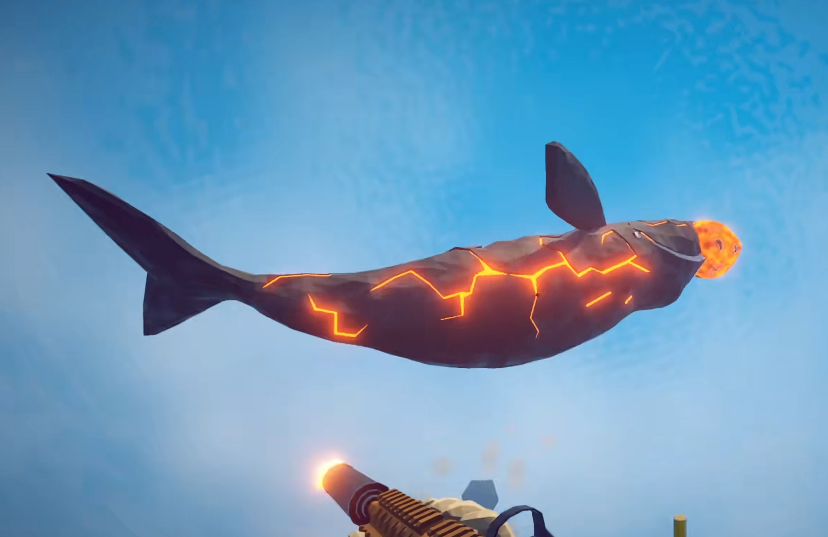
Volcano Whale
| |
|---|
| Summoning | After defeating the Bowhead Whale, throw it into the volcano |
| Mechanics | A fire-enhanced Bowhead Whale with added flame attacks |
| Difficulty | Slightly above the Bowhead Whale, but essentially the same fight |
| Strategy | Use the Bowhead Whale tactics, plus dodge the fire attacks |
Co-op Boat Strategy (Final Boss)
In multiplayer, have one player drive the boat while the rest fight the boss from on board, circling the island.
It’s much safer than fighting on foot and you’ll barely take damage.
If the boat gets stuck, hop off and shoot it or blast it with dynamite to free it.
General Tricks & Cheese
Dynamite “Nuke” Cheese
- Dynamite damage has no damage cap
- Pile a huge stack of dynamite in one spot, lure the boss over, and detonate for a tactical nuke
- One exploding stick chain-detonates all nearby sticks
- With friendly fire disabled, dynamite won’t damage you either
Weapon Recommendations
- Early-to-mid game: Shotgun — solid damage and satisfying to use
- Late game: Fully-upgraded Assault Rifle is the best pick for the final boss
- Each island’s new gun basically becomes obsolete on the next island — keep upgrading
- Melee weapons (knuckles/knife) lose value after Island 1; not worth further investment
Controls & Movement Tips
- Sprint: Hold Shift + A/D/S to sprint sideways or backwards — extremely useful in boss fights
- Fishing rod loss: If you can’t reel your rod back in time during a boss fight, just drop it and pick it up again — no bait wasted
- Boss countdown: From Island 3 on, bosses have an escape timer — kill them in time
- Co-op: Bosses don’t regain HP when a player dies, so co-op is easier than solo; but boss HP and damage scale with player count
Survival Essentials
- Food heals you; grilled food heals more
- Seagulls will grab dead fish off the ground, but they won’t pick up seagull corpses — stack seagull bodies as mobile healing
- When in water, keep jumping — you won’t drown
Based on game version 1.0.5, as of August 23, 2026.